...Well actually not that far away, about a 15 hour car ride to be exact. Kaitlin and I have finally managed to take a vacation, something we have been trying to do for years. We wanted to go last year after we got married but the timing just didn't work. So this summer, on our one year anniversary, this will be our home from July 3rd-July 10th. We've rented a nice little cottage right on the ocean in Prince Edward Island Canada. It's going to be more fun than I think I can handle, with a grill and canoes and seal watching and dunes and ocean and more! Here is the view off our front porch...

 The thing is we have never taken a trip together, besides a quick drive to upstate New York and down to Mass to visit her family. It'll be a fantastic adventure, and hopefully give us a chance to unwind before the fall and winter madness begins. In the meantime we'll leave the shop assistant Olive in charge of everything...

May 17, 2008
In a land far far away...

May 16, 2008
New shop assistant needed
The shop assistant trying to open the door to my studio to inform me that our Ocean Whitefish supplies are running low... She does NOT like the door being shut so she can't come in, but alas it's too dangerous for a cat to be in here. It's for your own good kitty!

Custom Ring, part 5
This step is a big one, adding the mokume to the outside. I cut and shape these pieces the same way as the main sections of the frame. The mokume I'm using is only .5mm thick, so it's more of a laminate than a structural element; there are two advantages to this, though. The first advantage is that thick mokume is very, very hard to make and shape properly, and having thick corners would distort the pattern at the seams on the bottom. By building the frame and overlaying the mokume it creates an almost seamless look; I'll be able to portray this better with the finished piece.
The second big factor is I can heat treat the Argentium to be many times stronger than Sterling, copper or mokume could ever be--this has been a huge factor in me using this metal. It has changed the way I design things as well.
I make the panels about .75mm wider than the ring frame itself, you can see the overhang in the image below. This gives me a good edge to feed the solder into, and minimizes the risk of solder getting on the mokume finish...which I also cover in yellow ochre, to prevent any chance of unwanted solder flow. Cleaning solder off the mokume could straight out ruin it, tricky tricky. I was too into soldering to stop and try and get pictures, it's a very tricky process with the panels, but here is the piece with all the panels soldered on. The heat has colored the outside to look close to the finished patina, it's looking sharp! But it's still in its "ugly phase" as I say, with rough edges and yellow ochre stains on the inside.
 Here's an image with the bezel resting in place (the stone isn't set into the bezel yet though). It's starting to look like a finished ring!

Custom Ring, part 4
Now that the frame is solid, I'm going to add the connecting bracket across the top, this will also serve as the anchor for the bezel and top plate. It's a little tricky get this piece to sit just right, usually takes a lot of filing and checking and filing and checking. It is mainly sitting in their with tension, as I have not devised an easy way to hold it in place.

Again, a little blurry... Notice the orange brown spots in the corners, this is yellow ochre painted over the previously soldered joints. This keeps previously soldered areas from melting again and having everything fall apart!! Due to the heat conductivity of Argentium silver, this is not too big of an issue on this piece, but with traditional sterling silver it is a must. The yellow ochre acts as controlled dirt, and solder will not flow if the metal is not perfectly clean, regardless of temperature.
Custom Ring, part 3
The next step once the frame parts were finished is to solder them together. The bottom section will be soldered to the longer side pieces, this will make things easier to clean up, not having to get into the concave section. the solder should be applied to the outside of the shank, again making clean up easier. The soldering photo is a little blurry, it's a little tricky to take a good picture and solder at the same time!
 Once the sides are connected the extensions need to be removed, using a fine I blade cut right next to the base out, trying to keep the same angle that the bottom has.
 The last step in the this section is to file down the part that has just been removed for a smooth transition.

May 11, 2008
Milestone!
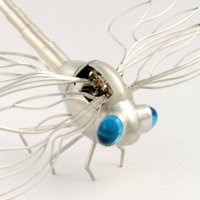
The Dragonfly hit 20,000 views on Etsy today! Actually it had 5200 before the counter was reset, so it's really had about 25,000, but seeing that 20,000 in the view counter is pretty cool!
Thanks to anyone and everyone who checked it out.
May 9, 2008
Nimli and Amazon
Recently I was invited to list some pieces on Nimli.com, a website that sells Eco-Friendly items and rates and lists each item's Eco-factors. I had not heard of them until I was contacted, so I was a little unsure of what kind of traffic and sales I could expect. None the less, I had my first sale off their site yesterday! They are a much different online retailer then Etsy, but I'm excited about the possiblities... I am even more thrilled that they list everything on Amazon.com!
So if you search for Jesse Danger on Amazon you get my Eco-Silver Satin and Lemongrass pieces!!! How wild is that? (Right now Amazon is being a little glitchy, so it says you can't buy them directly off Amazon, but you could earlier today!)